
The Windows operating system has been around for a long time and therefore people expect it to look a certain way. Taskbar running horizontally along the bottom of the screen and icons organized on the desktop in a grid. Unfortunately, the default desktop setup is not optimized for the best use of your screen. This is especially problematic if you are using a Windows device with a smaller screen. However, with a few simple tweaks, you can customize your Windows 10 desktop to make the most of your screen space. In this guide, we are going to tell you how to maximize your screen area in Windows 10
Change your screen resolution
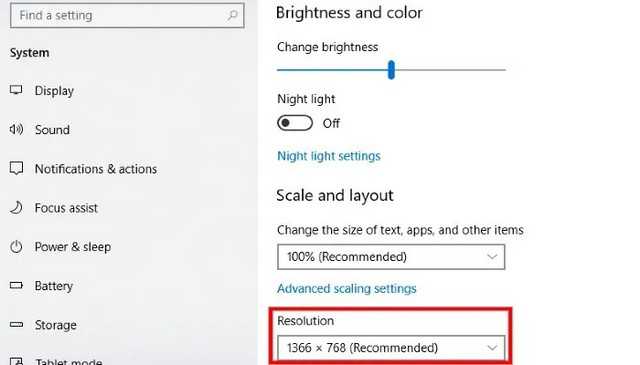
The first thing you can do to save screen space is to check your device’s display resolution. Increasing the resolution can make text and icons sharper and reduce them as well. This means that they take up less space.
To change your screen resolution, click on the Start button to display the Start menu. Then open the Settings menu by clicking on the gear icon. With the Settings window open, click on “System” and select “Display” from the left menu. Scroll down until you see “Display Resolution.” Select an appropriate resolution from the drop-down list. Choose the resolution that works best for you.
Use small desktop icons
If your desktop seems cluttered, one of the easiest ways to clean it is to resize your desktop icons. To do this, right click on the desktop, highlight “Display” and select “Small icons”. Alternatively, if you are using a Windows 10 device with a touchscreen, you can press and hold on the screen to display the menu. This will automatically reduce the size of your desktop icons and free up space if needed.
Prepare the taskbar
The taskbar has been one of the most recognizable aspects of the Windows 10 operating system. It houses the Start button and software icons, allowing users to quickly launch frequently used programs. However, the taskbar can take up quite a bit of screen space, at least at its default setting. Fortunately, there are a number of aspects you can tweak your taskbar to minimize its clutter.
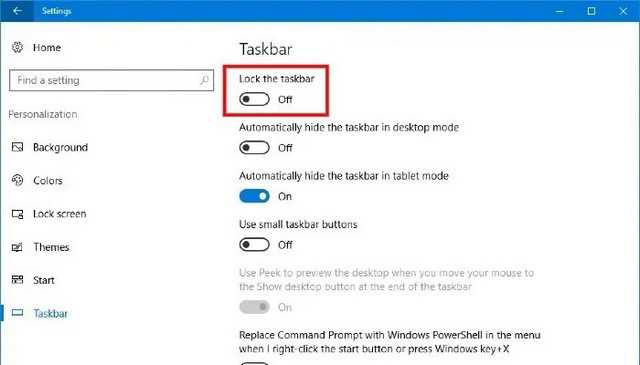
That being said, Windows 10’s taskbar is locked by default. This prevents any changes to the appearance or behavior of the taskbar. Therefore, the first thing to do is to unlock the taskbar. To do this, right click on an empty part of your taskbar and click on “Taskbar settings”. In the Taskbar Settings menu, make sure the toggle switch labeled “Lock Taskbar” is turned off. If it’s enabled, you won’t be able to make changes to your taskbar.
Use smaller taskbar buttons

As we mentioned above, the taskbar contains software icons and system buttons. They are all useful; however, the default size is quite large. Unfortunately, this in turn makes the taskbar eat more of your screen. Fortunately, you can change the size of the system icons and buttons on the taskbar.
To do this, right click on an empty part of the taskbar. In the contextual menu that opens, click on “Taskbar settings”. In the menu window, scroll down to find the toggle switch labeled “Use small taskbar buttons” and turn it on. This will drastically reduce the icons and buttons on the taskbar. In addition, it will reduce the size of the taskbar itself, allowing you to maximize the area on the screen.
*Change the location of the taskbar
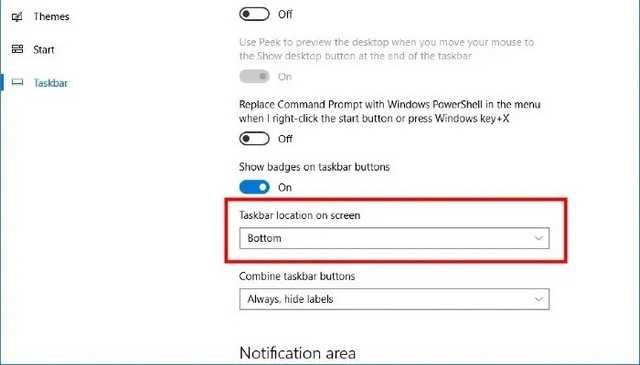
Speaking of the Windows 10 taskbar, there are a few more things you can do to minimize its clutter. Return to the Taskbar Settings menu by right-clicking on the taskbar and selecting “Taskbar Settings”. In the Taskbar Settings menu, scroll to the option titled “On-screen taskbar location.” Using the drop-down menu, change the location of the taskbar from the bottom of the screen to the left or right of the screen.
Everyone’s screen size is different; however, virtually everyone uses a screen that has a “big screen” orientation. Moving the taskbar to the left or right of the screen will make better use of the available viewing area of your screen. Indeed, the left and the right of your screen are shorter than the top or the bottom. Therefore, by removing the taskbar from the bottom of the screen and moving it left or right, the taskbar will consume less of your display.
Automatically hide the taskbar
In order to maximize your screen area, you can consider hiding the taskbar completely. This little trick is probably familiar to Mac users, as it’s common knowledge that the dock, OS X, and the macOS taskbar equivalent, can be hidden off the screen and made visible when the mouse is turned on. brought to the bottom of the screen. The Windows 10 taskbar can be easily hidden so that it disappears when you don’t need it.
To do this, right click on an empty area of your taskbar. in the menu that appears, click on “Taskbar settings”. This will open the Taskbar Settings menu, which, if you’ve followed up, should be very familiar to you by now.
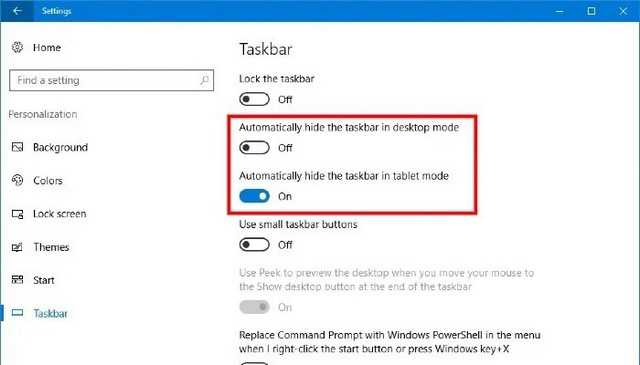
Find the toggle switch labeled “Automatically hide taskbar in desktop mode” and click it to the on position. Also, if you own a 2-in-1 device and want to hide the taskbar when your device is in tablet mode, tap the toggle switch titled “Automatically hide taskbar in tablet mode”.
Your taskbar should automatically disappear from your screen. To access your taskbar again, simply move the mouse to the edge of the screen where your taskbar is, and it will reappear.