
Whether for work or personal use, having an additional screen opens up a world of possibilities. Whatever the reasoning, if you connect an external display to your Mac computer, you can achieve more and face fewer limitations than single display setups. In this article, we take a look at how to connect an external display to your Mac and show you how your iPad can be put into use. We also discuss what you’ll need before you get started.
Before you start: find the right dongles or cables
Of course, you’ll need an external display at the bare minimum, although the right cables or dongles are needed depending on the age of your Mac. A good HDMI cable is a necessity for Macs dating from around 2012, although some of these models use other connectors.
MacBooks with a built-in DisplayPort require their own compatible dongles and cables to connect to an external display.
A Thunderbolt cable will be required for any external display designed for a MacBook. USB-C connectors will of course need dongles to connect everything.
Thunderbolt 3 compatible displays are also a good choice, as these cables will charge your laptop alongside when used as an external display. Apple has a How-To Guide to help you select the correct cable for your computer.
How to connect an external display to your Mac
Assuming you have all the right cables, physically adding an external display is straightforward: plug it into the correct port, and your display should mirror everything on your MacBook computer.
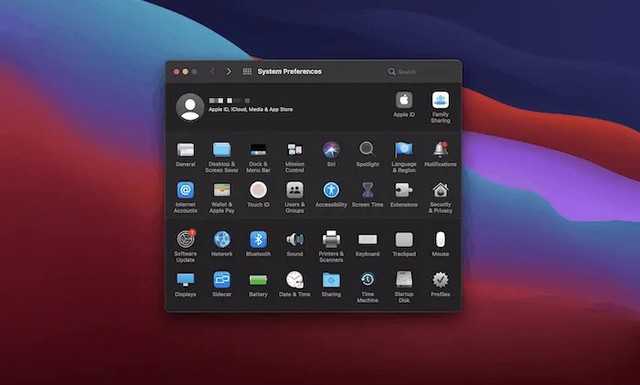
At this point, you will need to organize the two displays so that you can switch between screens. To do this, access your “System Preferences”, either from the Apple logo in the toolbar, or via a Spotlight search.
Next, choose the Views panel. When the pop-up window appears, click Arrange. You should see rectangles representing your screens. The main screen is displayed with a white border at the top. From there, you can implement the following:
Mirror your screen . It’s great if you need more space without needing multiple windows.
Use separate screens . If you uncheck the mirroring displays option, you can extend your desktop using the second monitor.
For optimal performance, the best positioning is to align the monitors with the way they are physically positioned. If you have the external display in front of you and the MacBook on the right or left, arrange the displays this way by dragging the rectangles until they are positioned correct
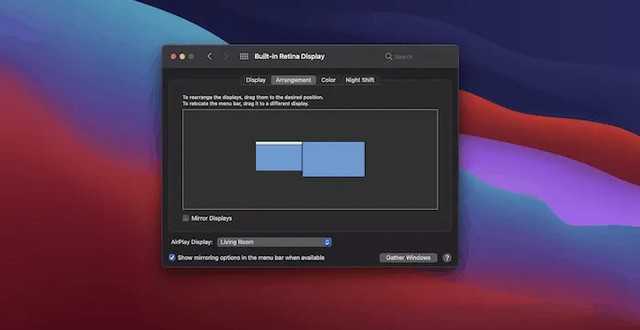
To make your second display the main one, you can drag it to the left side of the screen by clicking on the white bar. Note that your main screen will be the one that receives notifications from the app. The dock will also appear on any screen where the mouse cursor is currently located
Using the Sidecar function with your iPad
An iPad might not be considered a traditional display, but from macOS Catalina you can use the Sidecar feature. This feature allows the iPad to act as an additional screen for your computer.
For this to work, you will need a supported macOS computer . You will also need an iPad running iOS 13 or higher. This includes iPad Pro, iPad 6th generation or later, iPad mini 5th generation, and iPad Air 3rd generation.
The configuration of the Sidecar is the same for wireless and wired connections. Using a wired connection is as easy as using a USB-C or Lightning cable to connect the two.
To activate Sidecar, make sure your iPad is on and near your MacBook. On the MacBook, look for the AirPlay button near the menu bar in the upper right corner of the screen.
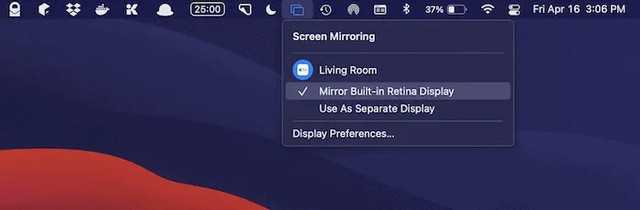
In the drop-down menu here, you should see the iPad you want to use as an external display.
Click on the iPad and your devices should connect and start working. You can now move windows from your MacBook to your iPad to use them as a secondary display.